There’s something about the smell of meat sizzling over an open flame that brings people together like a family reunion with free beer. Whether you’re cooking ribs slow and low or throwing on some dogs for the kids, a backyard BBQ pit is the unsung hero of summer weekends and smoky get-togethers. But here’s the best part you don’t need to spend a pile of cash or haul fancy equipment from the hardware store to build one. Nope. Chances are, you’ve already got most of what you need lying around your yard, garage, or stacked behind the barn.
If you’re the kind of person who sees possibility in a pile of bricks and believes duct tape and grit can fix just about anything, then this guide is for you. Let’s roll up our sleeves and turn your clutter into a cookout.
Why Build a BBQ Pit Yourself?
Before we dive into the how-to, let’s talk about the why. Store-bought grills are fine, sure, but they’re like the fast food of outdoor cooking. A backyard BBQ pit? That’s the home-cooked Sunday supper of grilling. It’s built with care, it’s rooted in tradition, and it’s got the kind of personality that shiny metal grills can only dream of.
Plus, it’s cheaper. Like, way cheaper. With a little creativity and elbow grease, you can build a functional, long-lasting BBQ pit without spending more than the price of a good steak.
And here’s the kicker it’s fun. You’ll get to flex those DIY muscles, maybe knock back a cold one while you work, and at the end of the day, you’ve built something with your own two hands that’ll bring people together.
Step 1: Scout the Land
First thing’s first pick a good spot. You want somewhere flat and level, away from flammable stuff like tall grass, trees, and, for the love of brisket, your house. Fire safety matters. A nice open patch in the backyard, with room for chairs, coolers, and a cornhole setup, is ideal.
Pro tip: Don’t build too close to the neighbor’s fence unless they’re the type who appreciates the sweet aroma of smoked ribs wafting their way. Otherwise, you might end up with more complaints than compliments.
Step 2: Gather What You Got
Now it’s time to do a little scavenger hunt around your property. Keep your eyes peeled for the following:
- Old red bricks or cinder blocks: These will form the walls of your pit. Make sure they’re not cracked or crumbling.
- Metal grates or oven racks: Anything that can safely hold food over a fire will do.
- Shovel and rake: For digging and leveling.
- Gravel, sand, or dirt: This helps insulate the bottom and keeps the fire pit steady.
- Rusty barrels, old pallets, or scrap metal: These can be turned into tables, prep areas, or seating.
- Steel rods or rebar: Great for propping up the grate if you’re going the rotisserie route.
This is where the magic happens looking at what you already have and seeing not junk, but potential.
Step 3: Dig the Pit
Once you’ve picked your spot and rounded up your supplies, it’s time to break ground. Use a shovel to dig a hole about 12 inches deep and three to four feet wide, depending on how much you plan to cook. The idea is to go deep enough to contain the heat but shallow enough for you to easily tend the fire and flip those burgers without doing a deep squat workout.
Line the bottom with gravel or sand to help with drainage and heat distribution. This keeps your fire from scorching the grass underneath or turning into a mud pit if it rains.
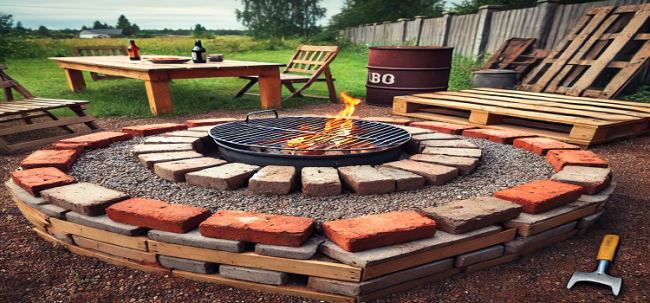
Step 4: Lay the Bricks
Now, stack your bricks or cinder blocks in a circle or square around the pit, two to three layers high. If the bricks are mismatched or stained, even better adds character. Make sure the walls are stable by offsetting each row like you’re laying a brick house. No mortar needed here; gravity and heat do most of the work.
Leave a small gap in one side for airflow. This helps your fire breathe and burn stronger, which is what you want when it’s time to get cooking.
Step 5: Find or Fashion a Grill Grate
Here’s where you can get crafty. A grill grate can be made from:
- An old oven rack
- A repurposed grate from a busted grill
- Expanded metal mesh (clean it well!)
- An old shopping cart basket (again, clean it)
Lay it across the top of your brick pit. If it doesn’t sit level, use metal rods, rebar, or extra bricks to prop it up. You can even rig up a rotisserie-style spit with two sturdy posts and a metal bar. Bonus points if it spins.
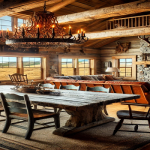
Step 6: Build Seating and a Prep Area
Now that your pit is ready to go, let’s talk comfort. Haul out some old chairs, tree stumps, or logs to sit on. Use pallets or scrap wood to build a makeshift table. Clean out a rusty barrel and turn it into a trash can, or better yet, an ice-cold cooler holder.
Throw up some string lights if you’re feeling fancy, and now you’ve got yourself a redneck paradise.
Step 7: Fire It Up
To light your fire, use dry wood or charcoal whichever you’ve got. Avoid pressure-treated lumber or anything with paint or chemicals on it. You want to flavor your meat, not poison it.
Stack your wood in a teepee or log cabin style, light it, and let it burn down to glowing coals. That’s when the magic happens. Toss on your steaks, burgers, corn on the cob, or even a whole pig if you’re feeling bold.
Just remember to keep a hose or bucket of water nearby safety first, always.
Step 8: Celebrate Like a Champion
Now you’re not just some guy or gal with a grill. You’re a pitmaster, a backyard legend, the architect of your own meat empire. Invite friends, crank up the country music, and let the smoke roll.
Got leftover brisket? Turn it into tacos. Too many beers? Nap in a hammock. There are no wrong moves when the fire’s crackling and the food is hot.
Why This Works
The beauty of a homemade BBQ pit is its blend of practicality and personality. You’re reusing materials, keeping costs low, and building something truly unique. Plus, it’s fun. There’s a real sense of pride that comes from cooking over something you made with your own hands.
And for the redneck at heart, it’s more than just grilling. It’s about community, tradition, and keeping things simple. You don’t need stainless steel gadgets or Bluetooth thermometers just a good fire, good folks, and good meat.
Backyard BBQ Done Right
At the end of the day, building a BBQ pit from stuff you already got laying around is as much about the experience as the end result. You’re crafting something that turns your yard into the neighborhood hotspot. It’s functional, affordable, and filled with character just like you.
So go ahead, dig in literally and start building. You’ll not only save money, but you’ll create a backyard gathering place that’ll smoke store-bought grills right out of the water.
And remember, if you get it a little wrong the first time, that’s alright. Every pit gets better with use and a little soot. Just don’t forget the sauce.